

 614
614
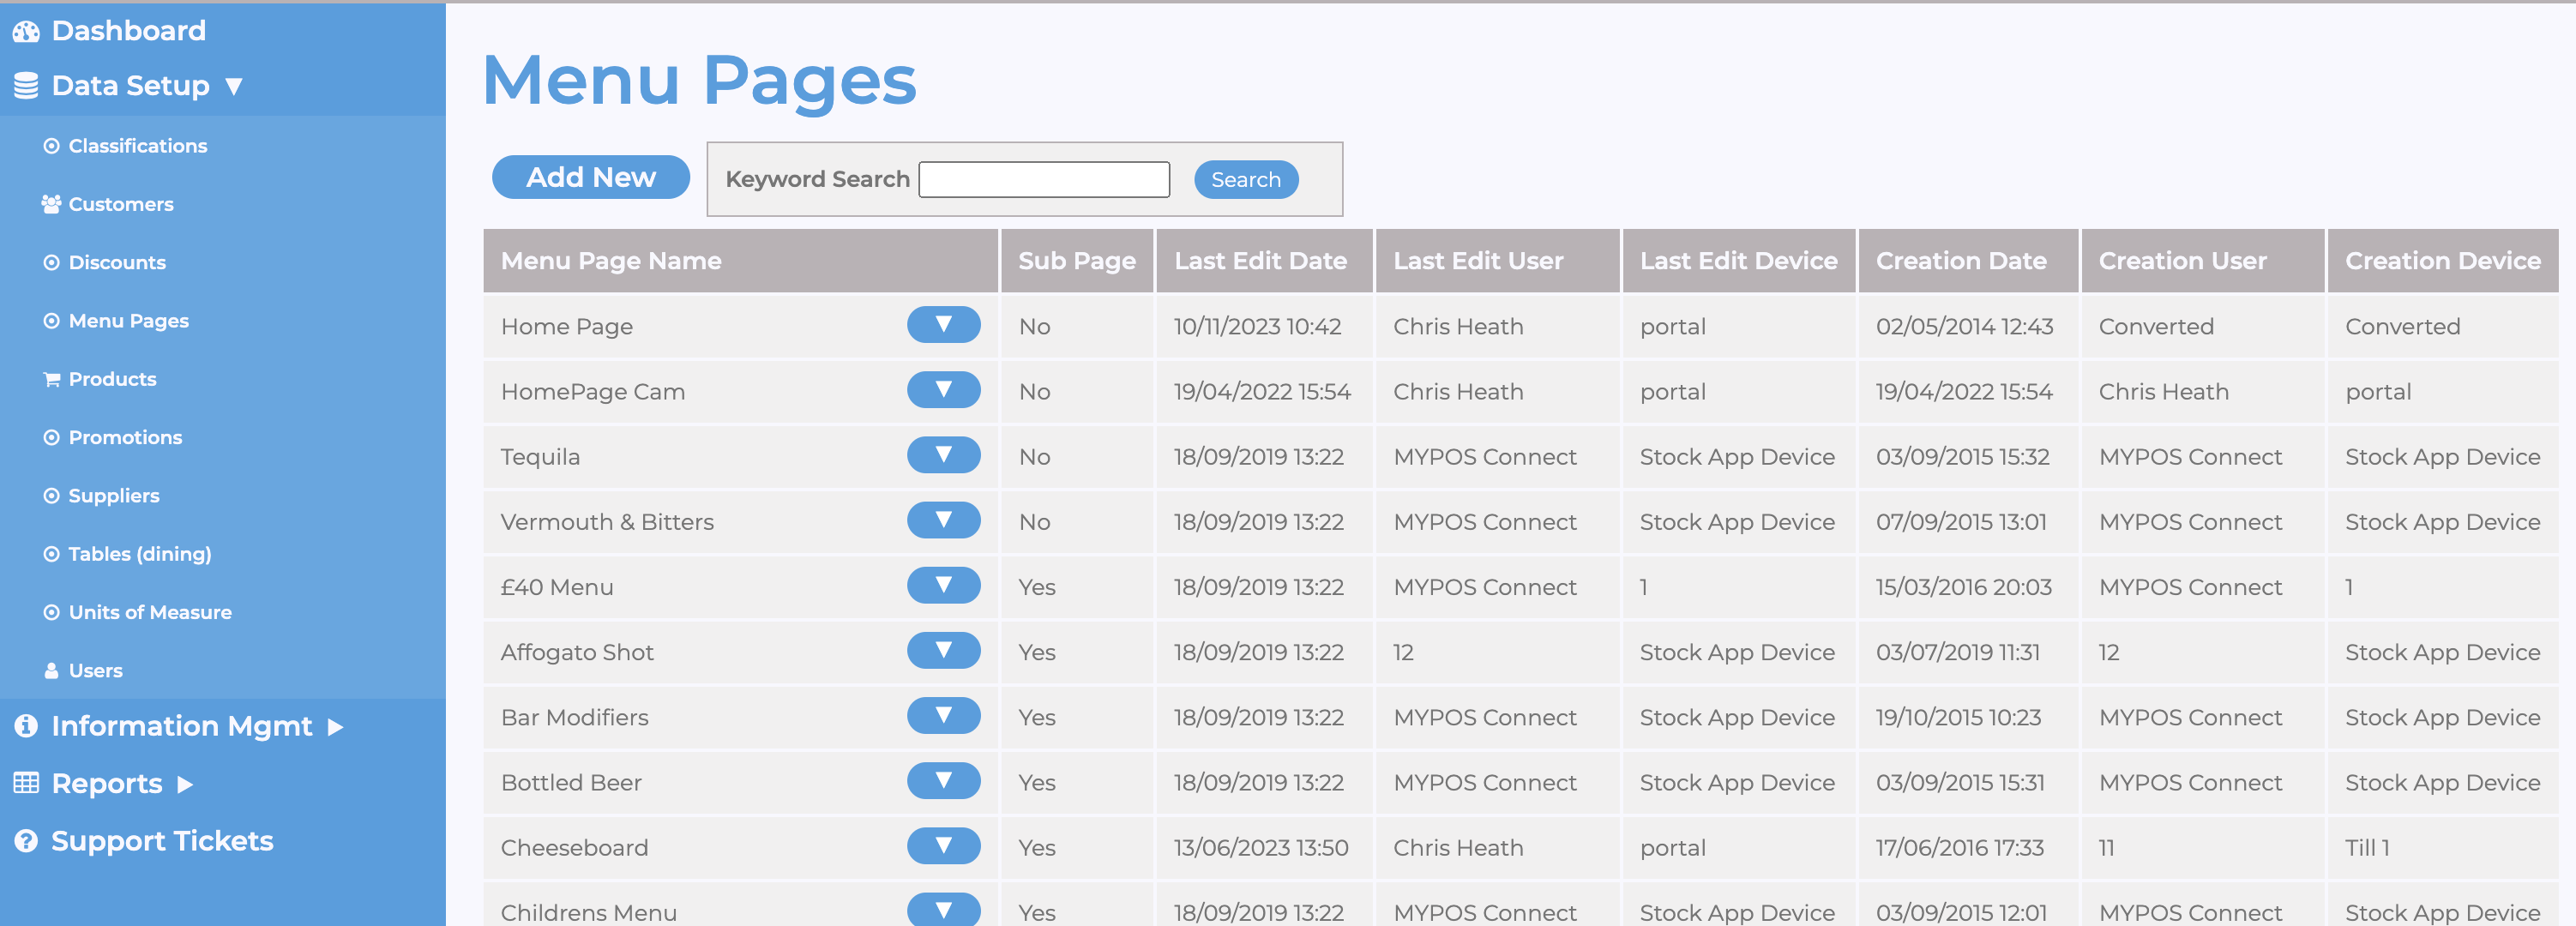
Menu Pages are the various Pages that take up half of the MYPOS interface (the left hand side) these are normally used for organising product buttons as a way to ring up items into the MYPOS Till Roll
To begin with you will need to go to the MYPOS Portal at https://portal.myposconnect.com and sign in with your email address and password

Once you have logged in you will see several menu options on the left hand side of the Portal, select the "Data Setup" option and choose "Menu Pages" from the dropdown options that appear below
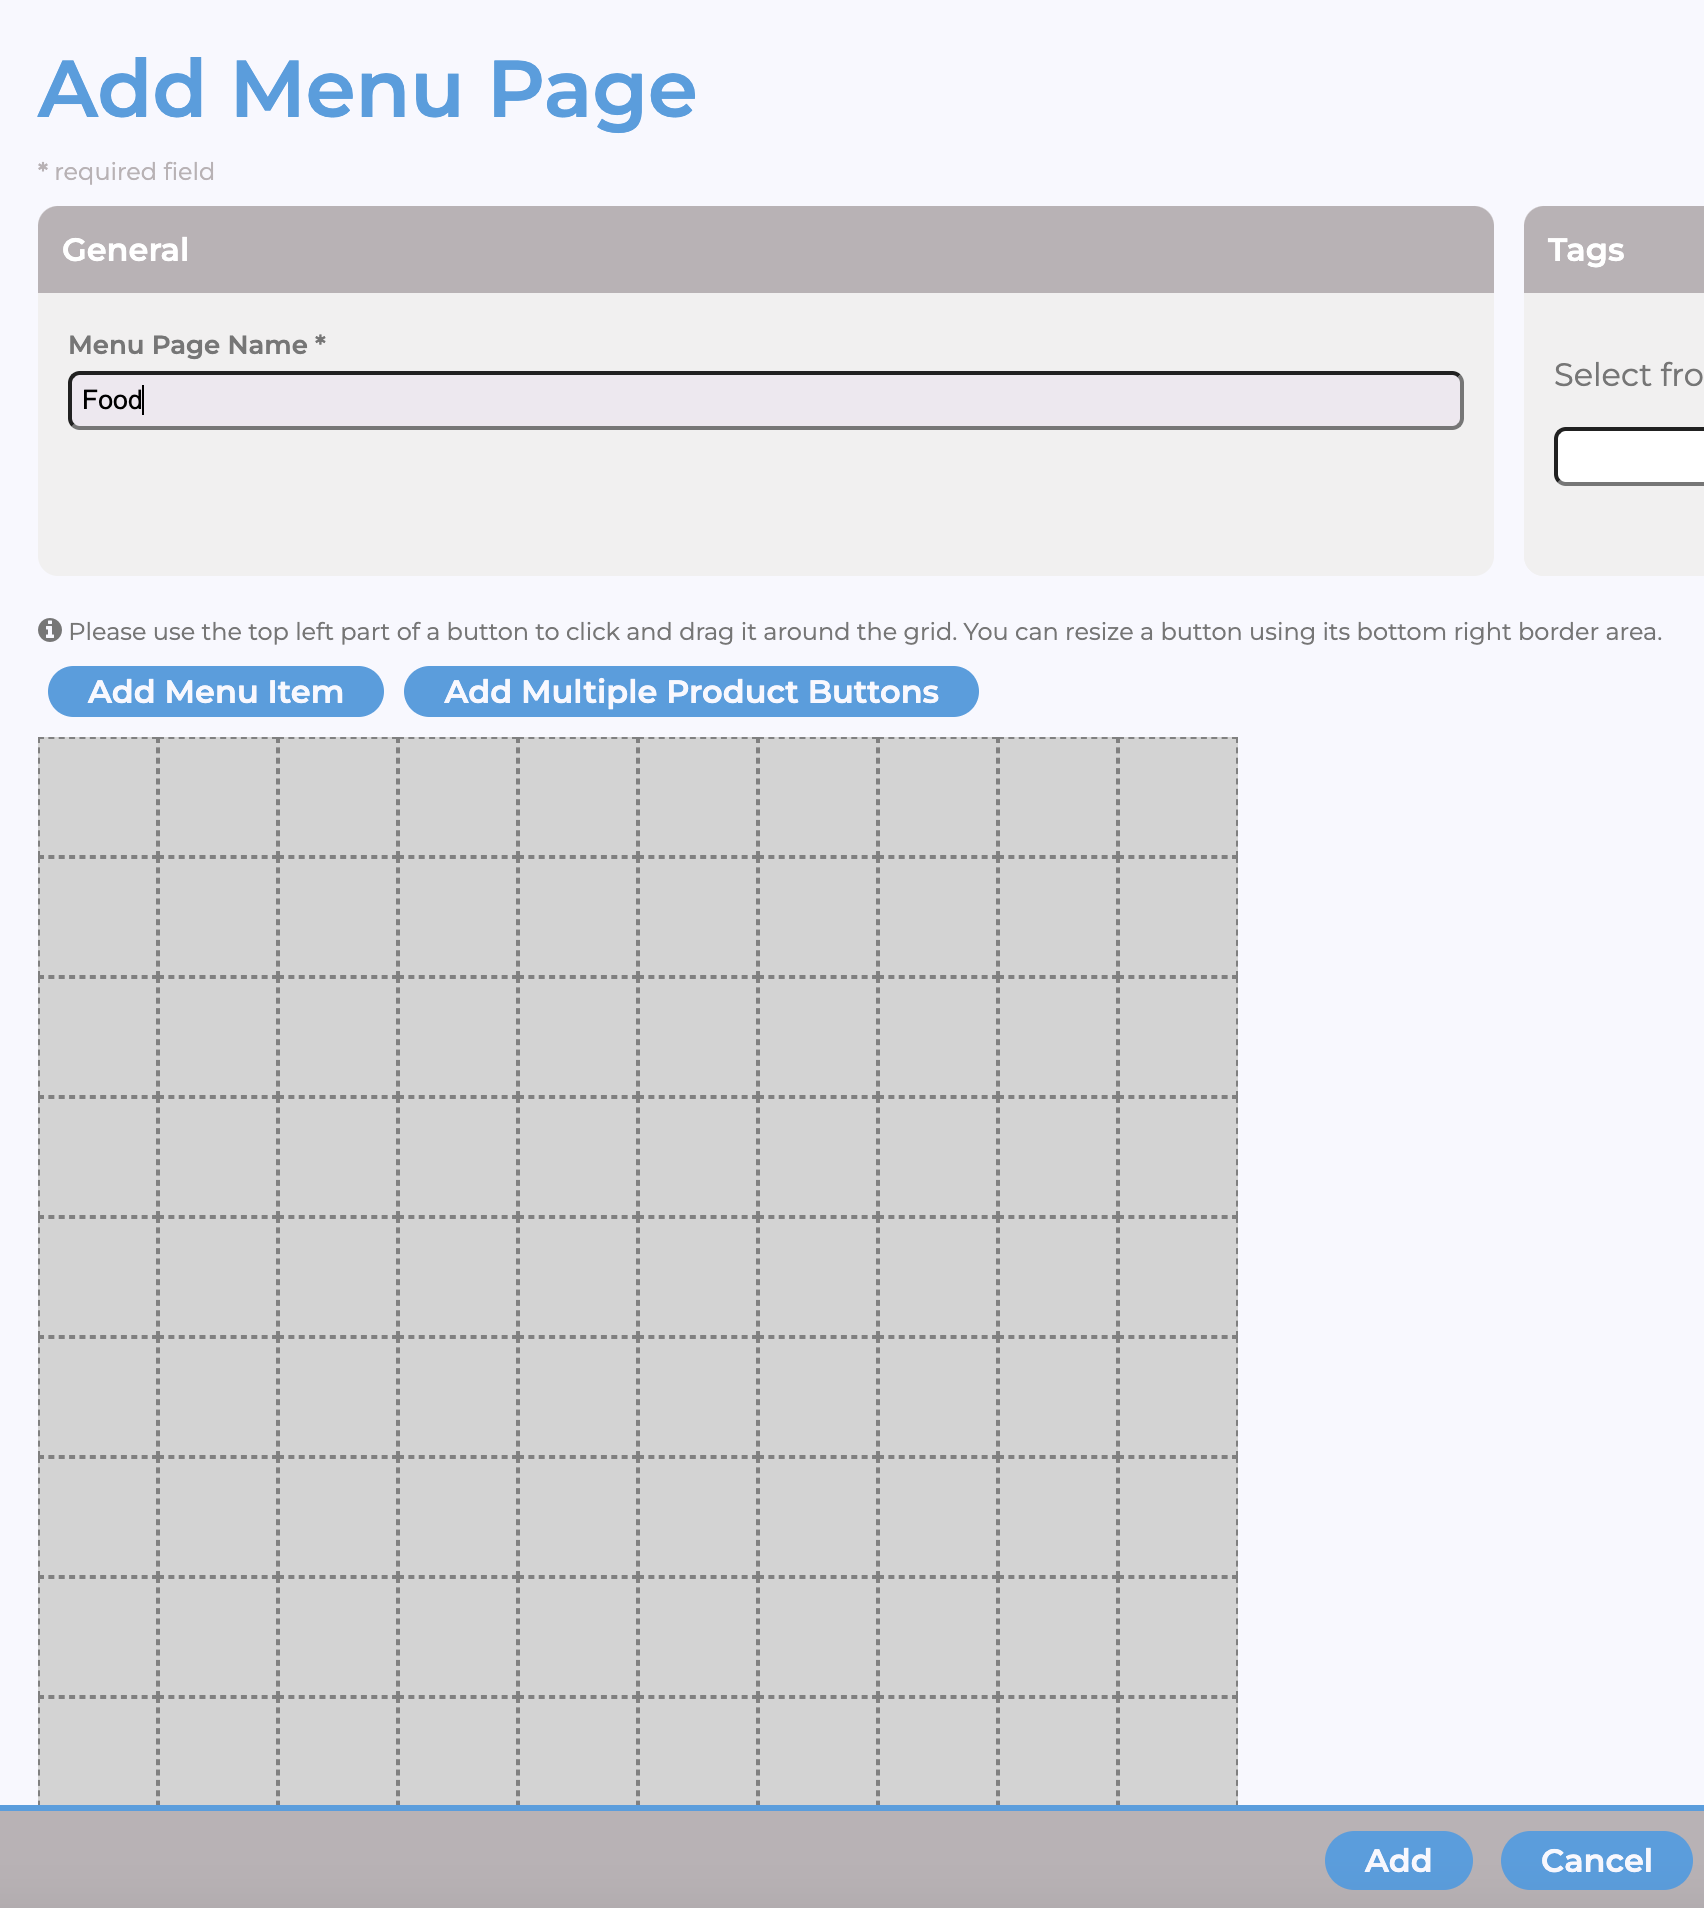
To add a new page click > Add new & type in your menu page name & click add to save.
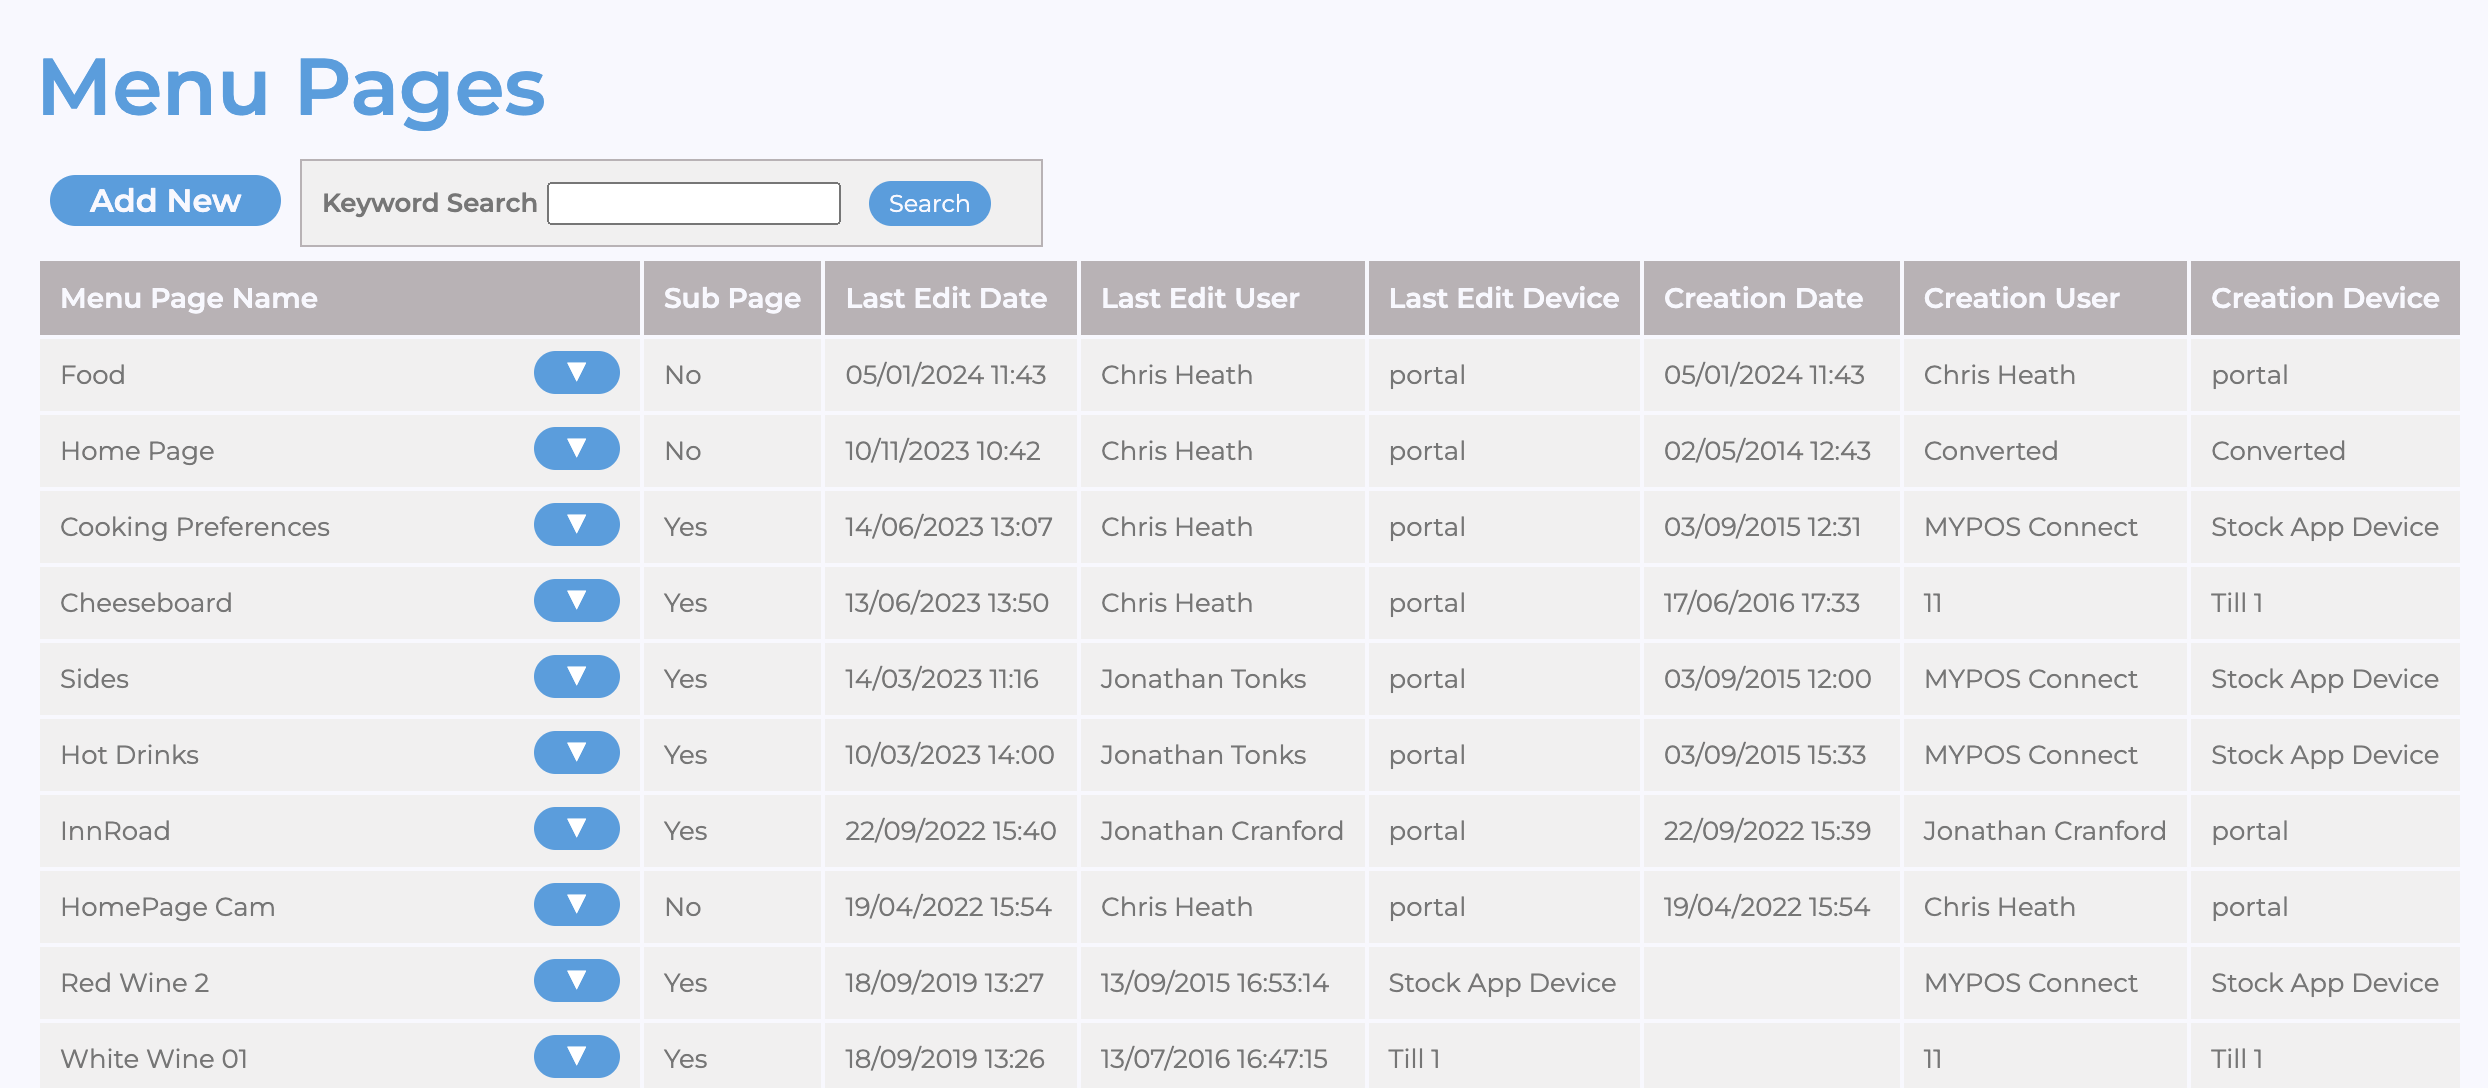
The menu screen will show on the list of created menu pages.
You can create each menu page as a standalone page or you can link it other pages for it to become a “sub page”

